|
Although I'm just helping out on this project (where I can) and living vicariously through the rest of the process, I figured I'd post an update on the progress of my friend Patrick's workbench. He got the legs mortised into the top, and today we flipped the top over and set it in place. Next he'll move onto flattening it, bench dog holes, etc. Picture is below... 
1 Comment
My friend Patrick is building a Roubo-style workbench.. He and I saw-milled out six large Southern Yellow Pine timbers for the bench top a few months ago and they have been air drying in his shop since. On Friday we jointed and thicknessed them all and then did the massive glue-up. The joints came together perfectly, and although we clamped them up on a less than ideal surface (sawhorses), the slab came out about as flat as we could have hoped. We let it all sit in clamps for about 24 hours and then trimmed the ends square. The pictures below show some of the process...The last picture is the 24"x8' slab loaded up in Patrick's truck headed home for some cleanup and mortises for the legs. 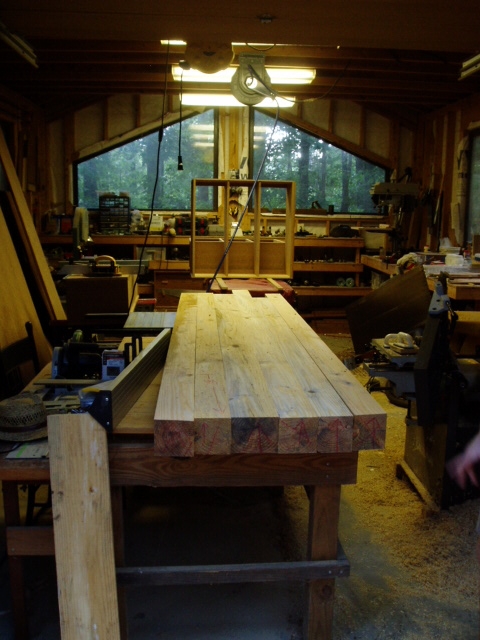 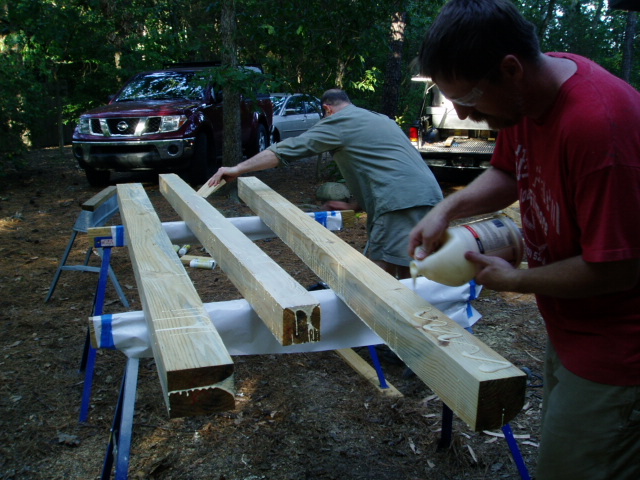 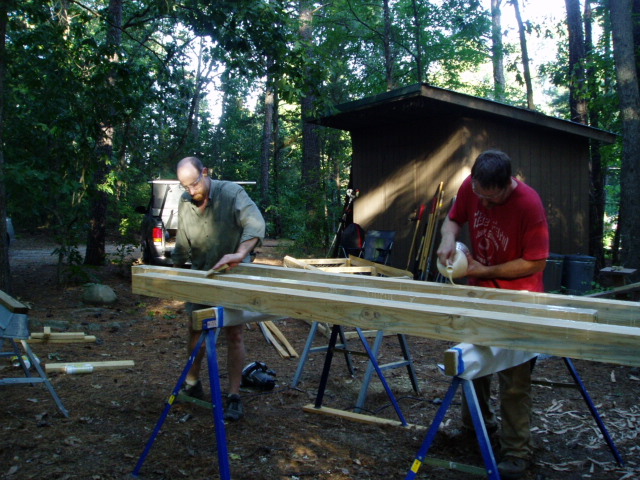 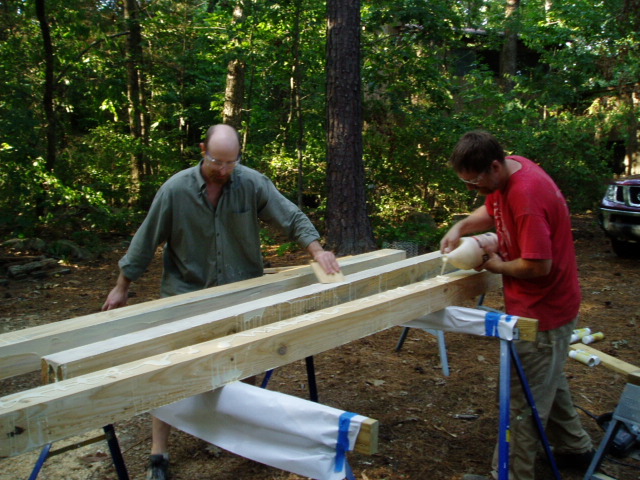 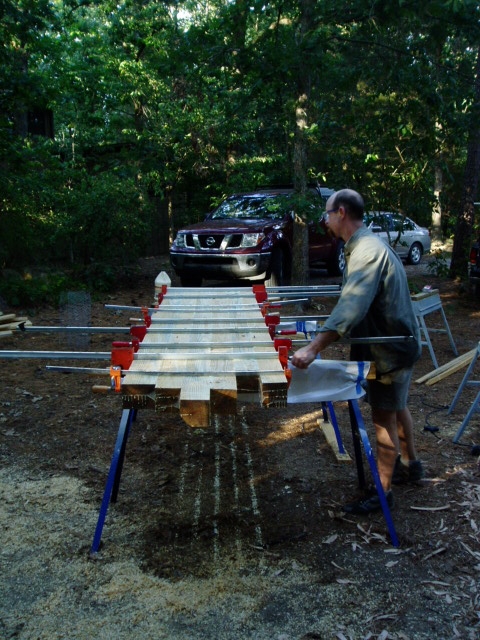 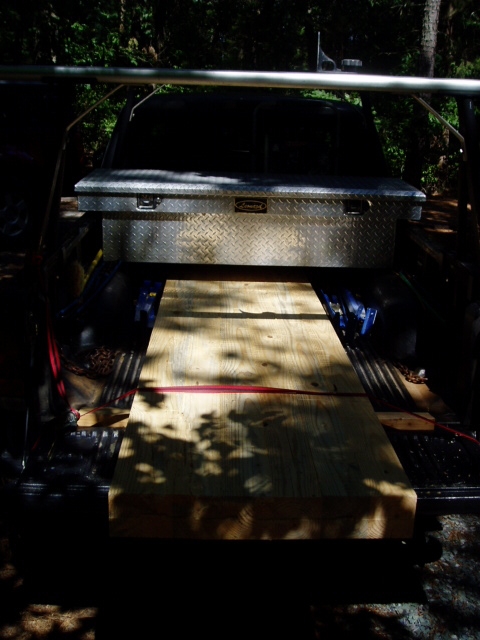 As I have said before, I thoroughly enjoy it when folks come over and we work on a project together. It's some of the best time spent in the shop for me.
I'm currently learning how to build a continuous arm Windsor chair. My teacher is Elia Bizzarri, a local chair maker who does one-on-one classes at his shop here in Chatham County, NC. He also teaches at The Woodwright's School in Pittsboro and various other places. He is a great guy & fantastic teacher, and I'm really enjoying learning some new skills. This kind of woodworking is new to me. Starting with the tree, we are riving out parts from the green wood with a froe, and refining them using a series of tools (draw-knife, spokeshave, etc.) There is some turning involved with the legs and arm stumps, and the white pine seat will be shaped with another set of tools (scorp, travisher, etc.) I'm only a couple of days in, and my way of looking at trees, wood, and hand tools has really changed. A couple of other highlights so far...
The first picture is Elia's shave horse which I used as a model. The last picture shows my rendition.    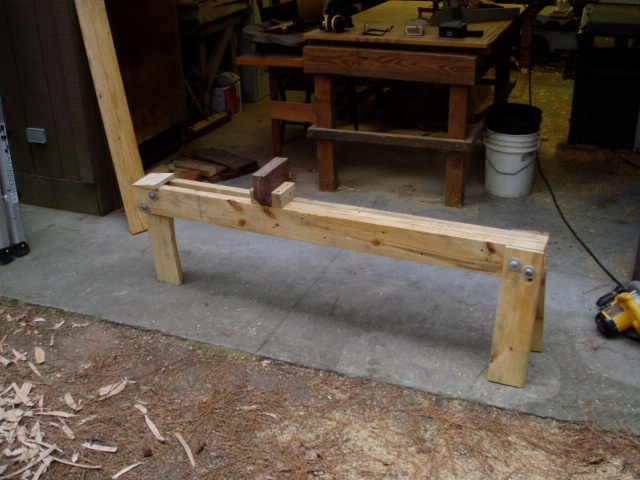  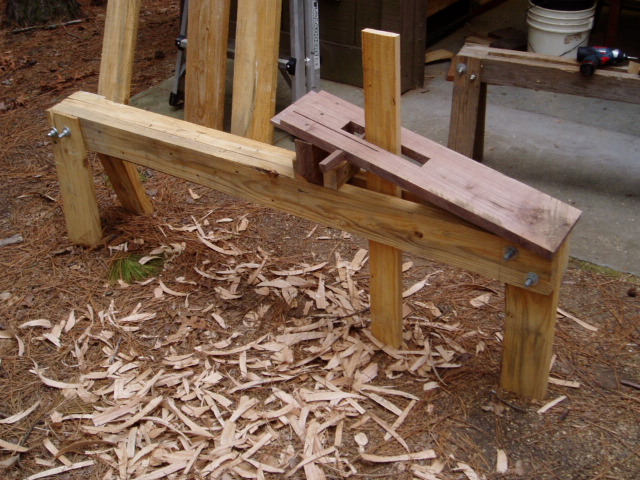  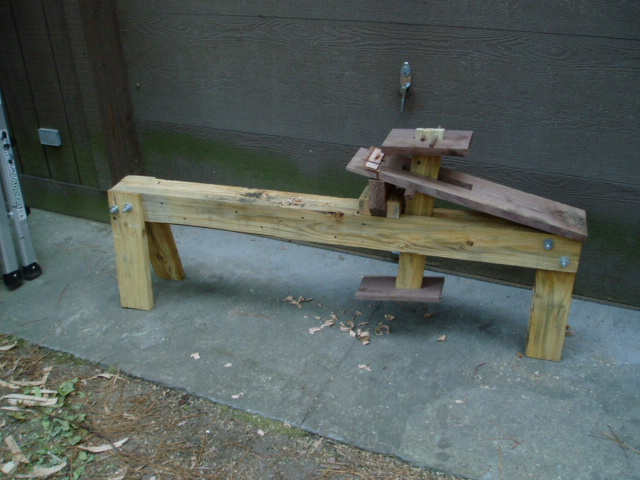 An finally some (not so good) pictures of the roughed out spindles and turned legs for the chair. 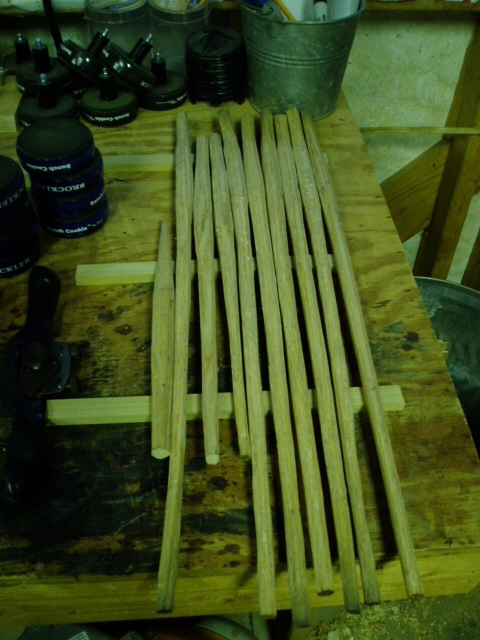 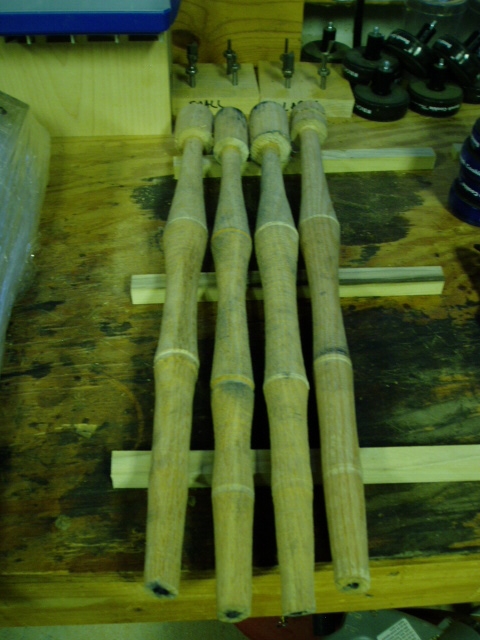 Just a quick update on the hanging kitchen cabinets I am working on. The backs are now in. They are made of poplar and put together with tongue & groove joints and mortise & tenoned into the top & bottom rails. The first picture shows the slats. You can see the tongue & groove on each slat as well as the tenons on the ends. The second picture shows one of the rails with the groove for the slat tenons. The third picture is one of the assembled backs showing off the beautiful poplar. And finally the last picture shows the backs in the cabinets themselves. 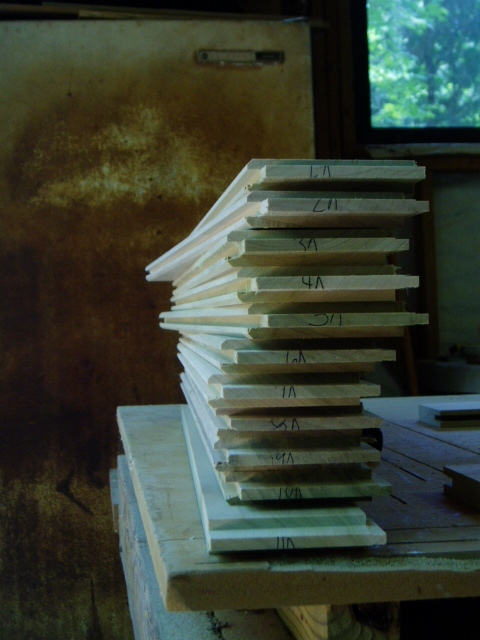  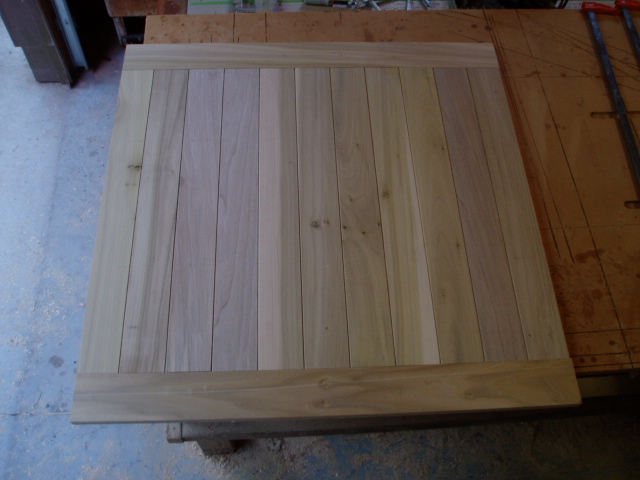 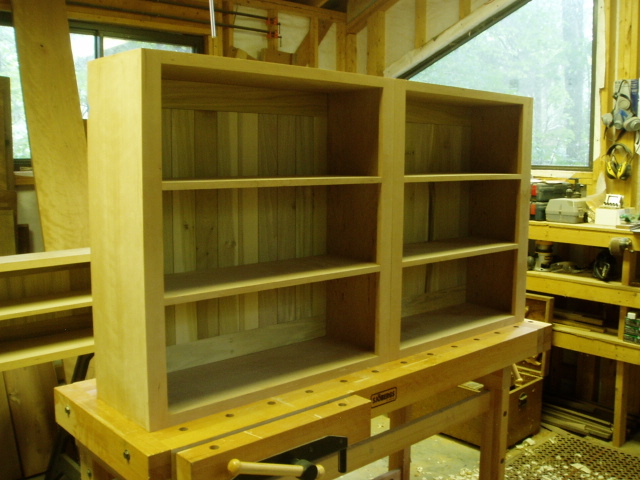 The pictures below are what it looks like when you literally have your work cut out for you. My friend Ricky Tillman & I spent a day logging all of the pines he took down to build a road on our property. I've been anxious to get this wood up and staged at the sawmill before it degraded along the sides of the road. This wood will be used for an outhouse and outbuildings. And as far as furniture goes, I'll be pulling some of the better boards out to make a few tables. 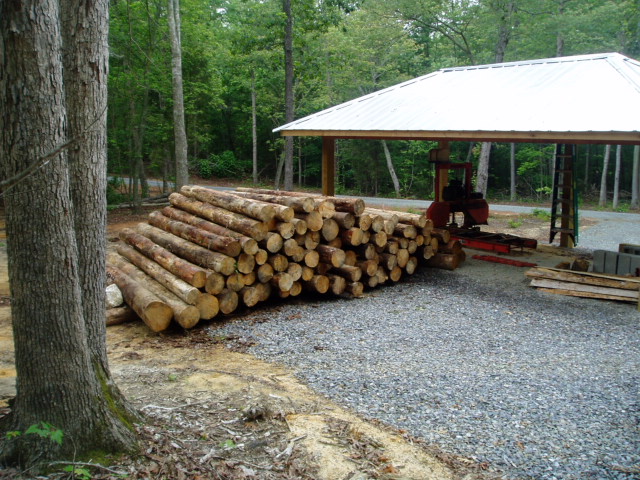  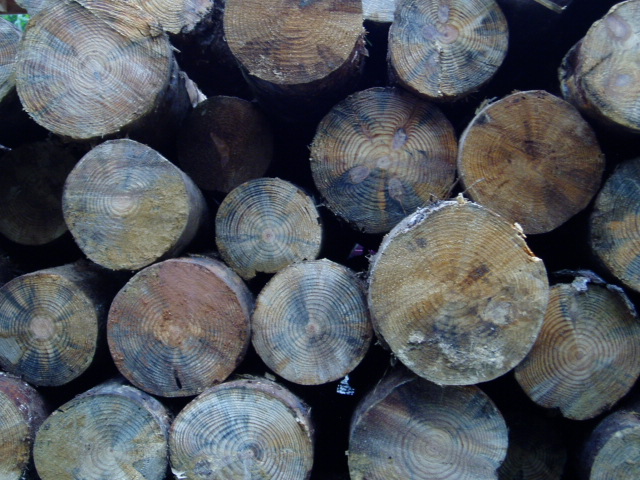 The pictures below are from an enjoyable Sunday spent in the shop getting to see the initial stages of building a fiddle. Shay Garriock came by the shop to rough out the top (spruce) and the back (maple) of the fiddle he is in the process of making. Shay has a great violin & fiddle shop right down the road in Pittsboro, NC. 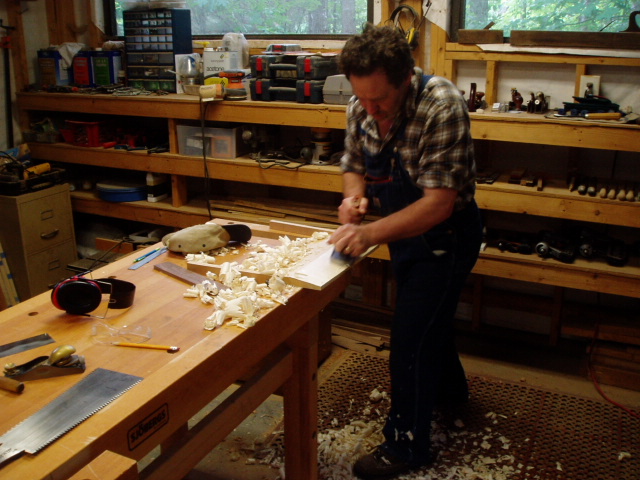  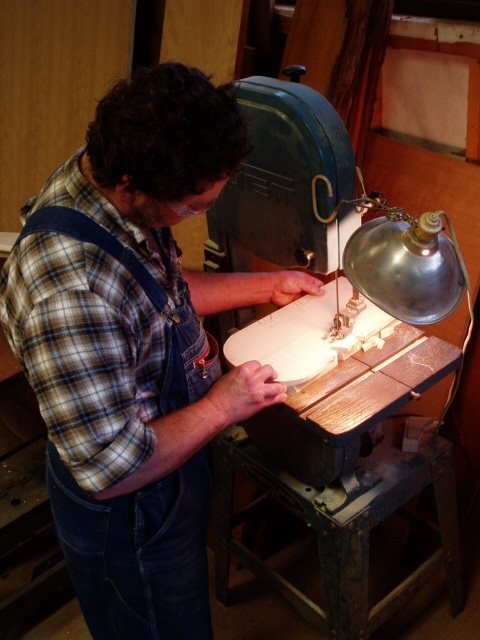  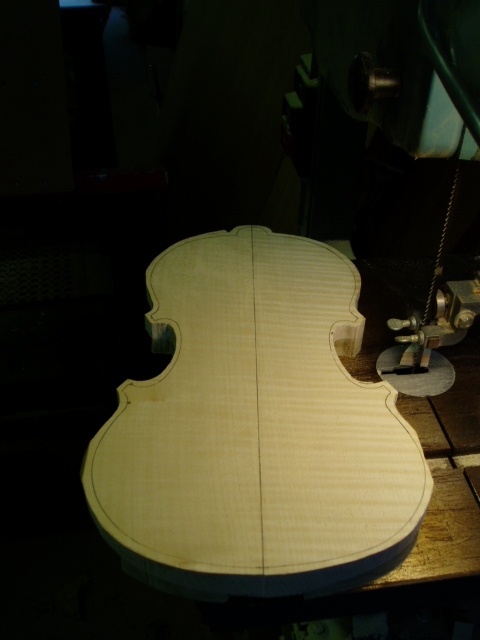  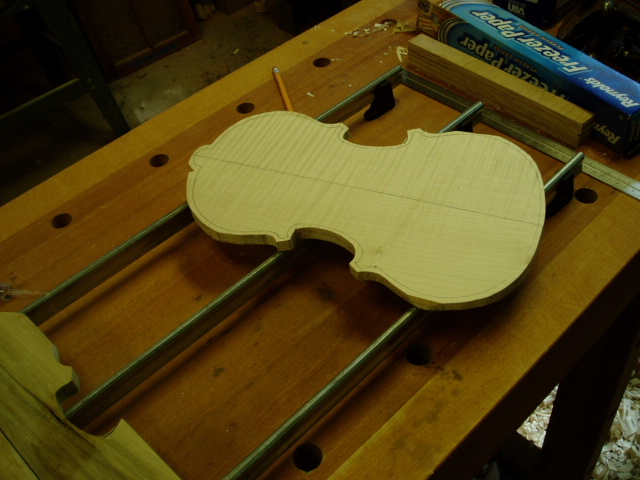  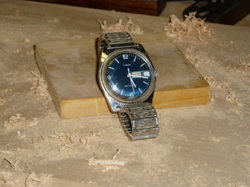 One of my most used tools in the shop is a watch. I've been doing a lot of gluing up the past couple of days and I use the watch to monitor my clamp time. The watch I use (pictured above) was my grandfather's. We all called him Paw Paw. He lived in the Florida Keys for many years, and I have a vivid image of this watch on his dark-tanned arm. He wore it all the time, and after all these years it still works great (yep..it's a Timex). I'm glad to have it in my toolkit. The gluing-up I have been doing has been putting face-frames on the kitchen cabinets I'm building. The pictures below show the progress. 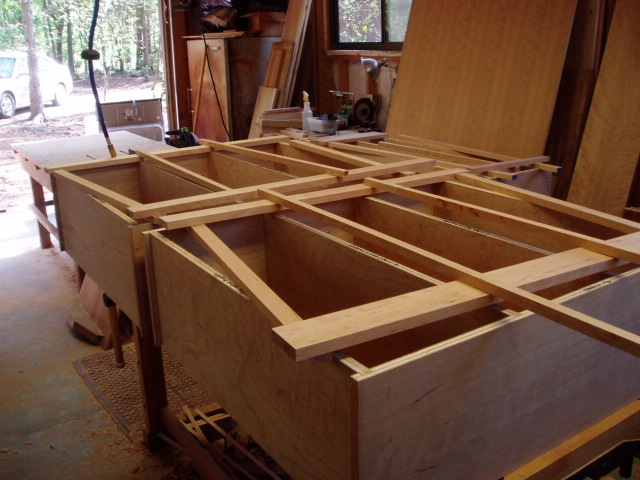 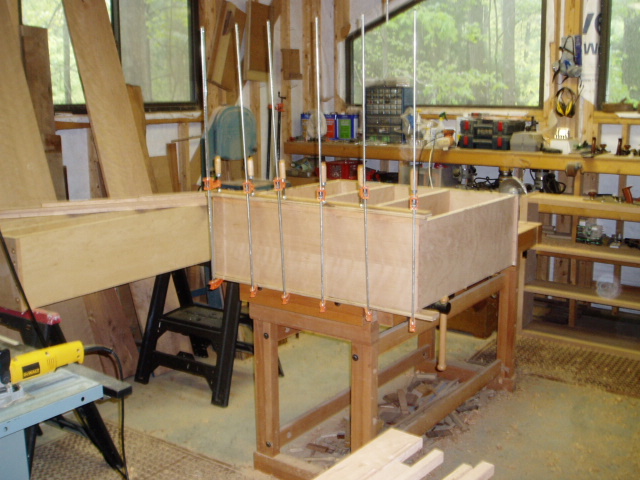  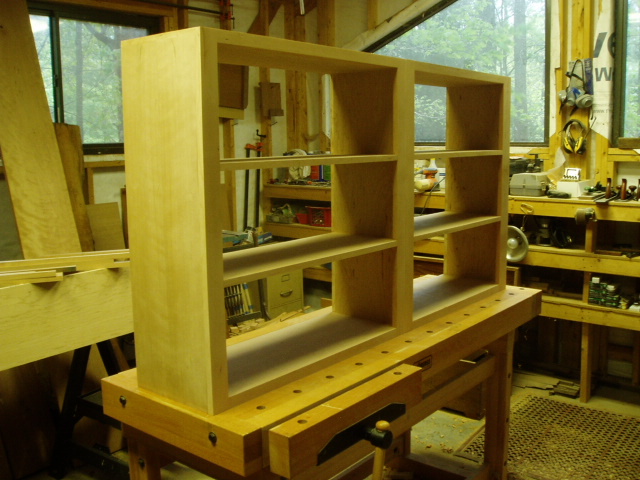 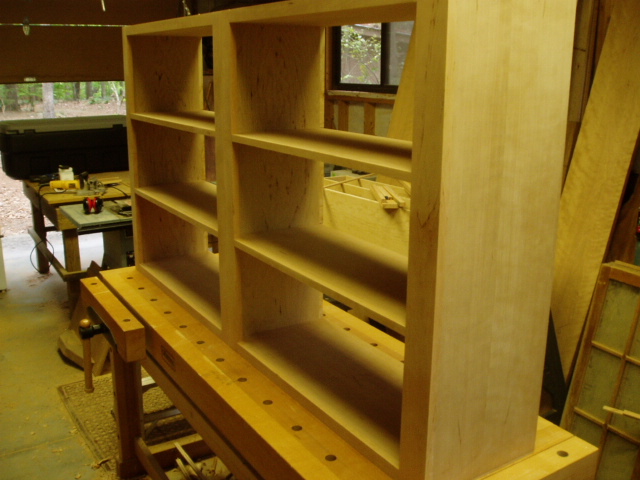 I just started on some kitchen cabinets. The pictures below show the progress so far. The first set is a few images from Sketchup. I mentioned this design tool in my last post and it has been a great help in laying out these cabinets. I discovered several issues that would have probably not have revealed themselves until wood was cut and mistakes were made. I was able to get started with a solid plan which allows me to focus on quality rather than being focused on figuring out construction details on the fly. The three images include the main layout, exploded view, and plywood layout. The ability to layout all the components on "virtual" plywood was extremely helpful...much easier than dealing with the big 4'x8' sheets and laying them out from scratch in the shop. 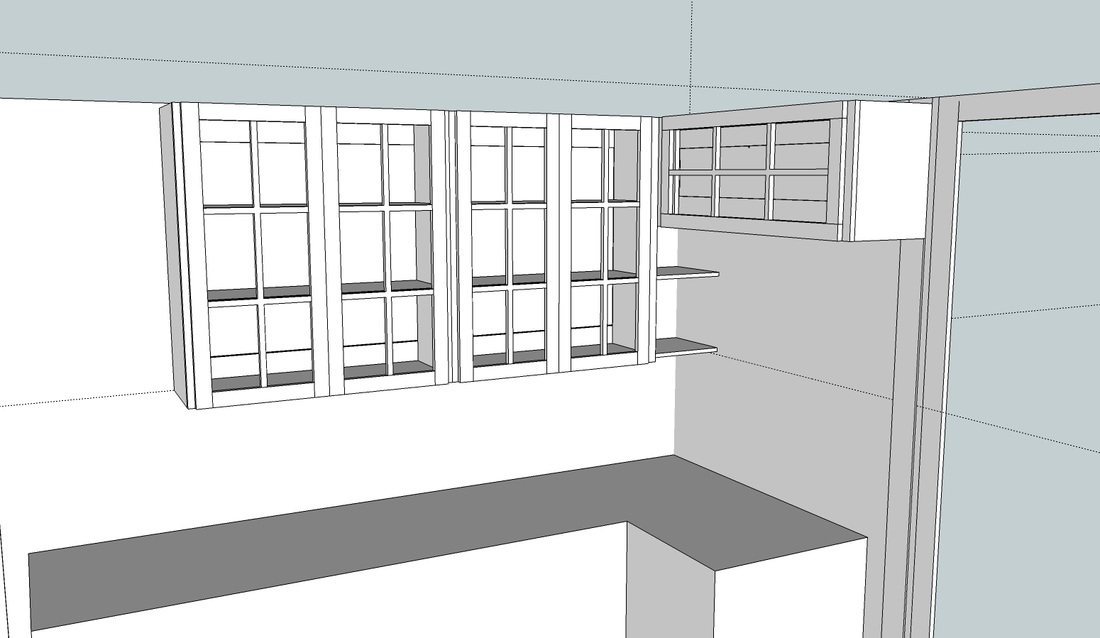 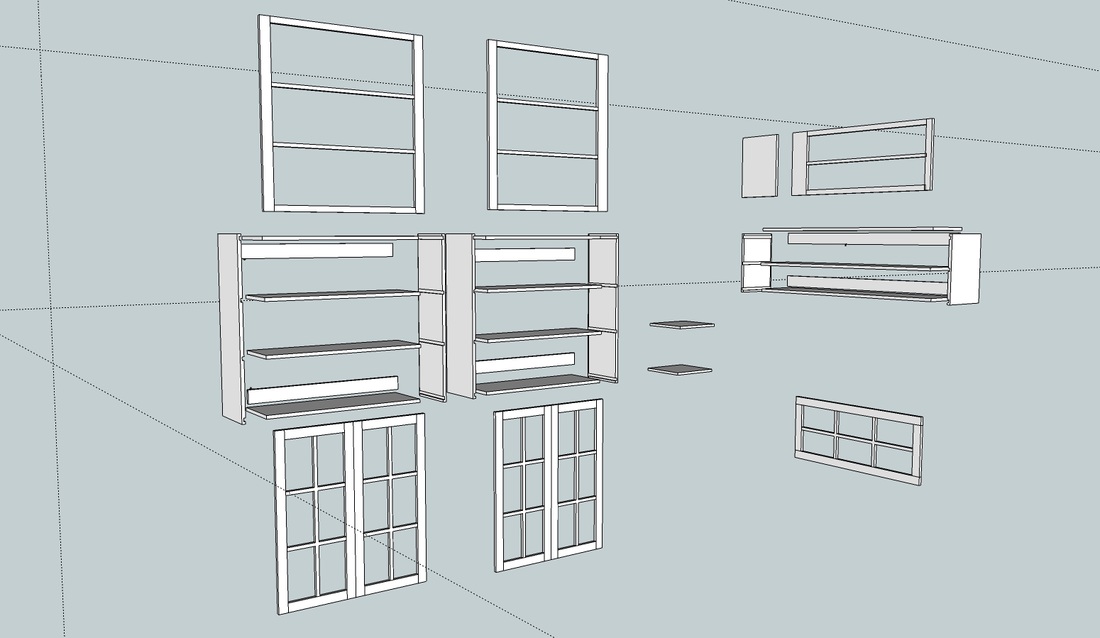 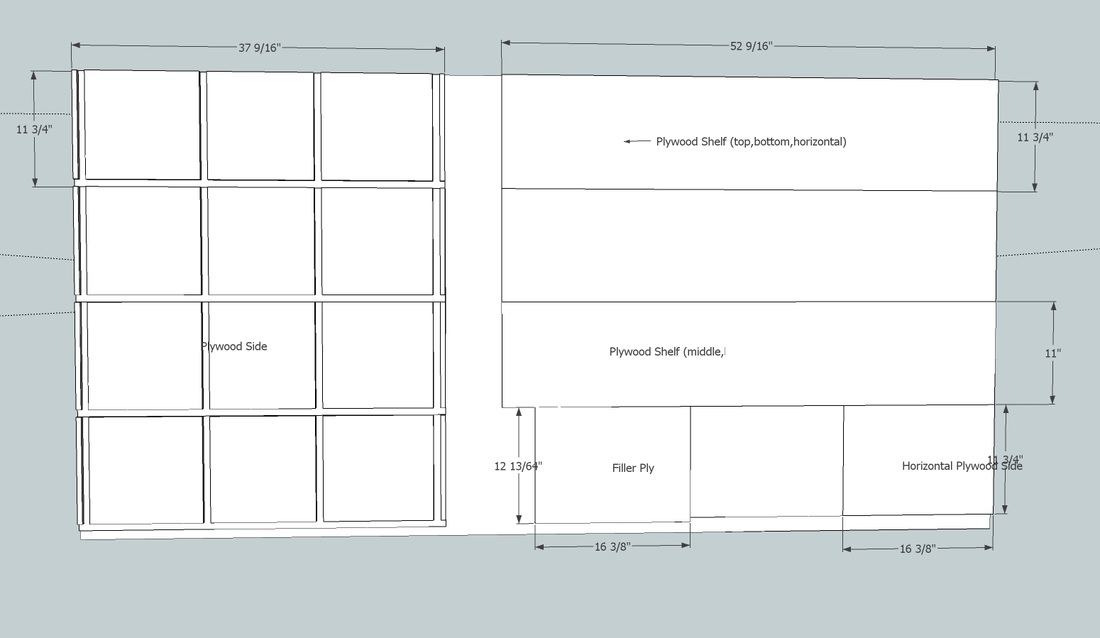 The next set of pictures shows the first day's work in the shop. The plywood sheets are broken down into components and the edge banding has been started. I don't often work with plywood, but quality plywood is nice. It's a good use of wood resources and things come together quickly. The stability of plywood is nice too. 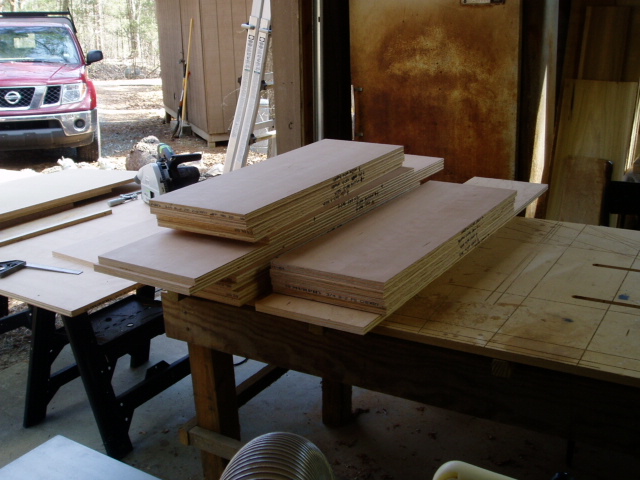 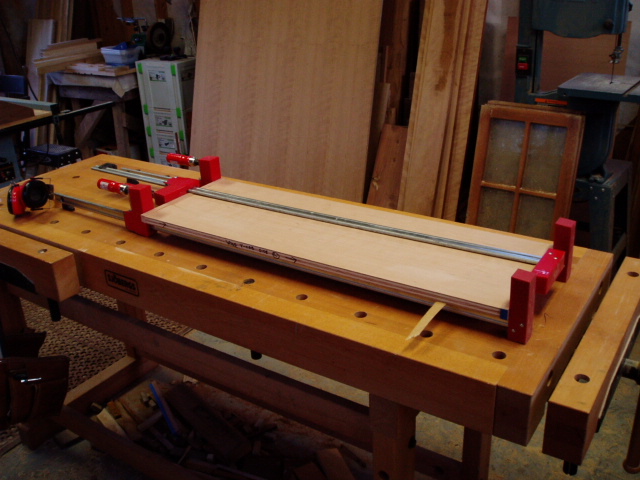  And finally (on a different note) a few shots of the first boards cut from 0ur sawmill. We bought a well-used Woodmizer about a year ago and have finally gotten the sawmill site set up and things in order. So far we have cut a bunch of 4/4 pine boards as well as a 5"x5"x10' hickory beam. I have some small walnut logs and a sizable persimmon. I'm excited to see what those will yield.  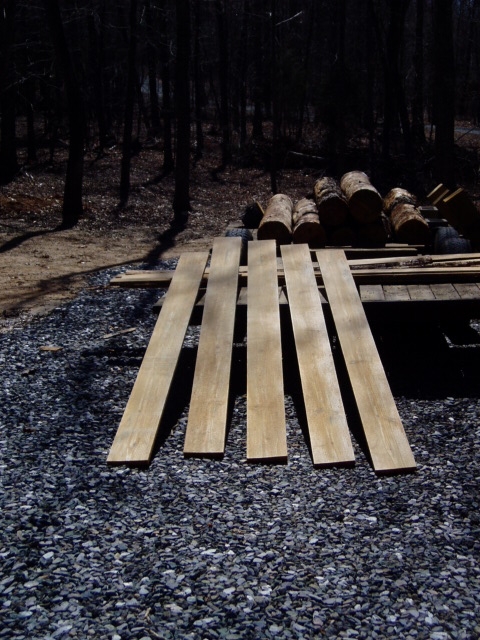 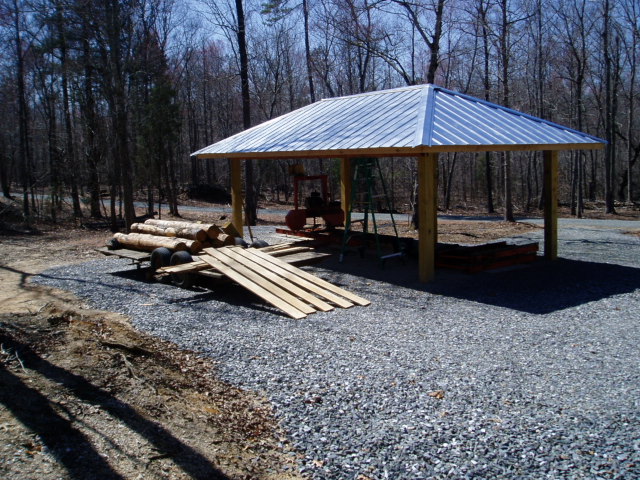 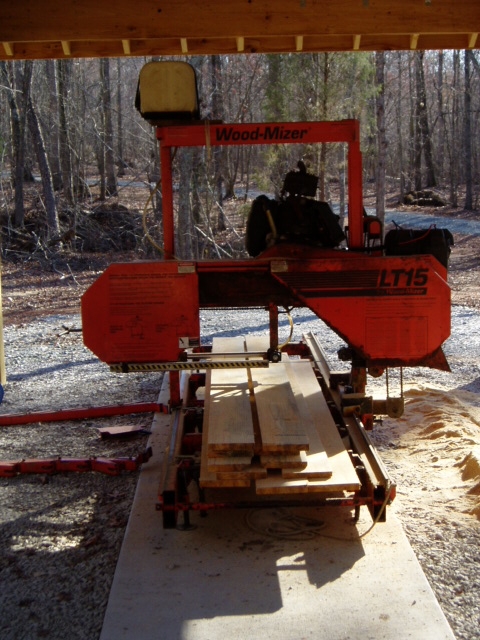 As far as shop-time goes lately I have been working on finishing up another keepsake box (see previous blog post). This will be the last one for a while, as the next big project is on the horizon...I have been working with a friend on the planning stages of some solid-wood kitchen cabinets. My friend salvaged some nice-looking doors for these cabinets. They are made of pine and will be painted as a contrast to a low-key stain on the carcass wood (red oak...maybe poplar). These doors are defining the cabinet dimensions. The cabinets will be pretty straight forward, so I took the opportunity with this project to dive into something I've been wanting to learn for a long time...Sketchup. Sketchup is a 3-D modeling tool developed by the folks at Google. It is employed in a myriad of applications and has become the de facto design tool for many woodworkers and cabinet makers. During a cold & icy 3-day period earlier this month, I made my way through Bob Lang's Woodworker's Guide to Sketchup. This book is in Adobe PDF format and has embedded videos that demonstrate many of the techniques described in the text. The book is a fantastic tutorial, and I can say that I now have a strong foundation for designing projects in Sketchup. The two pictures below were exported from Sketchup. The first is a view of the entire project. The second is a detail of the French cleat and mating wall mount piece that will be used to hang the cabinets. When you are in the program itself you can actually orbit around your model and view it from any angle as well as zoom in & out to see minute details. Modeling this project helped me work out some joinery details as well as lay out the cabinets on virtual kitchen walls that represent the dimensions of the actual space we have to work with. In fact if you look closely at the horizontally-oriented cabinet, you'll notice that it overhangs the door opening to the right by a small amount. This is a layout detail that will obviously need to be corrected, and the issue was easy to spot in the model...something that may have been a little trickier to discover just drawing out the cabinets on paper. Another nice feature in Sketchup is that you can take elements in your model and rotate them on an axis. This allowed me to swing the cabinet doors open and determine the spacing I needed (in the corner) in order to allow the doors to be opened to a convenient ergonomic angle. Lastly, I was able to show the model to my friend and we could discuss design options and she could see the cabinets in 3-d space and really get a good feel for how the cabinets will look when they are done. Going forward Sketchup will be my primary tool for evolving rough ideas from my sketchbook into actual formal plans to take into the shop. 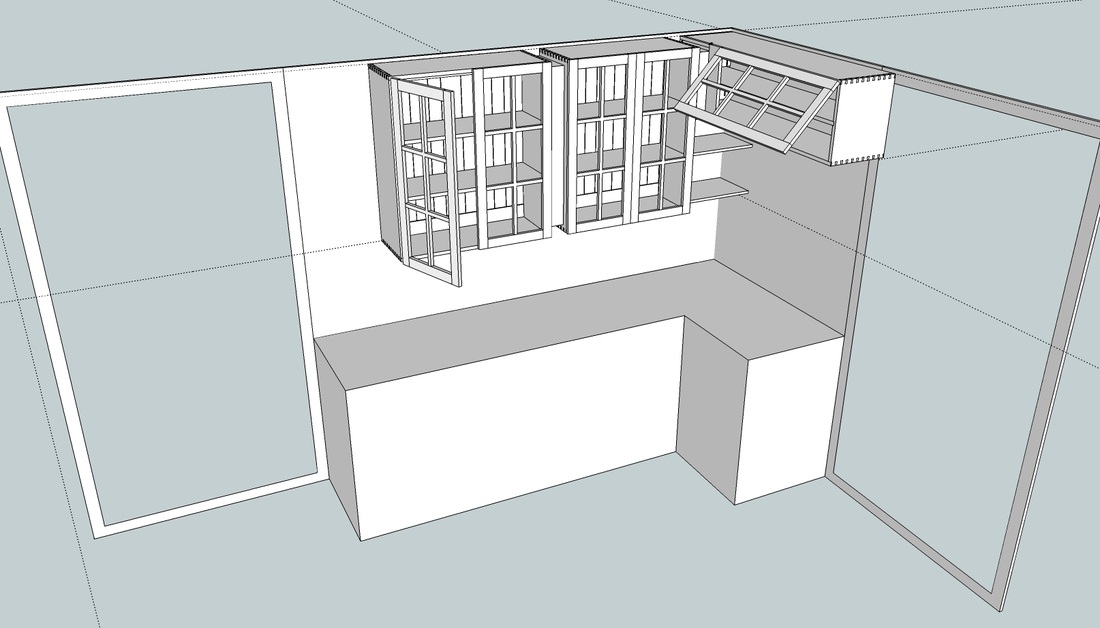 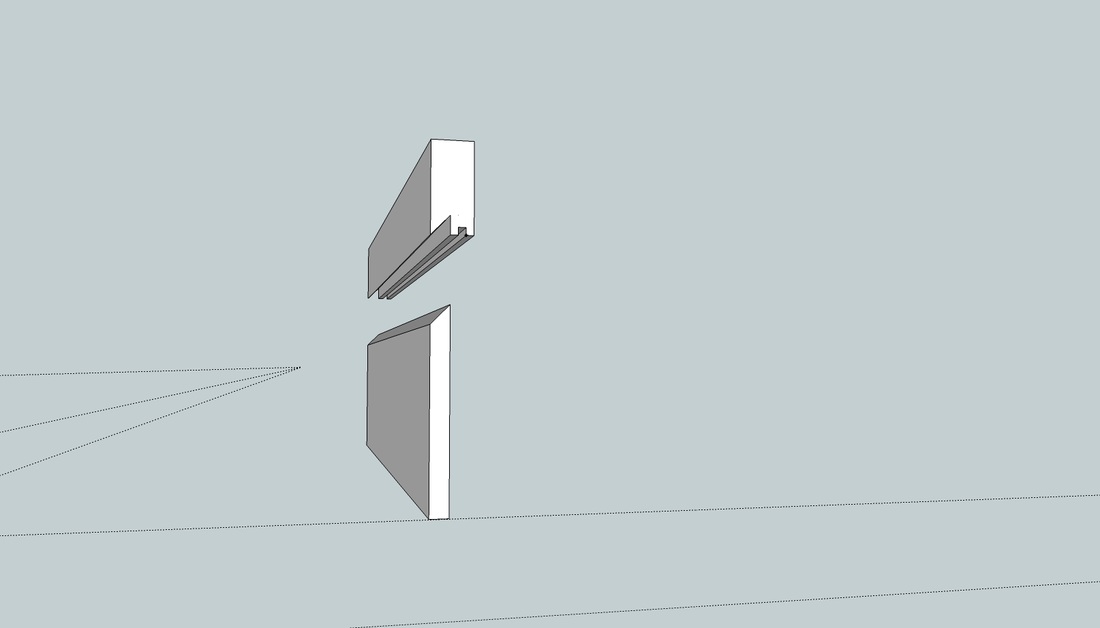 I finished up my "Christmas" box. The box is made of mahogany and walnut. I don't normally use exotic hardwoods, but a friend-of-a-friend gave me some scraps of the mahogany a few years ago, so I put them to use. Pictures are below. The last picture shows the miter splines waiting for the glue to dry. 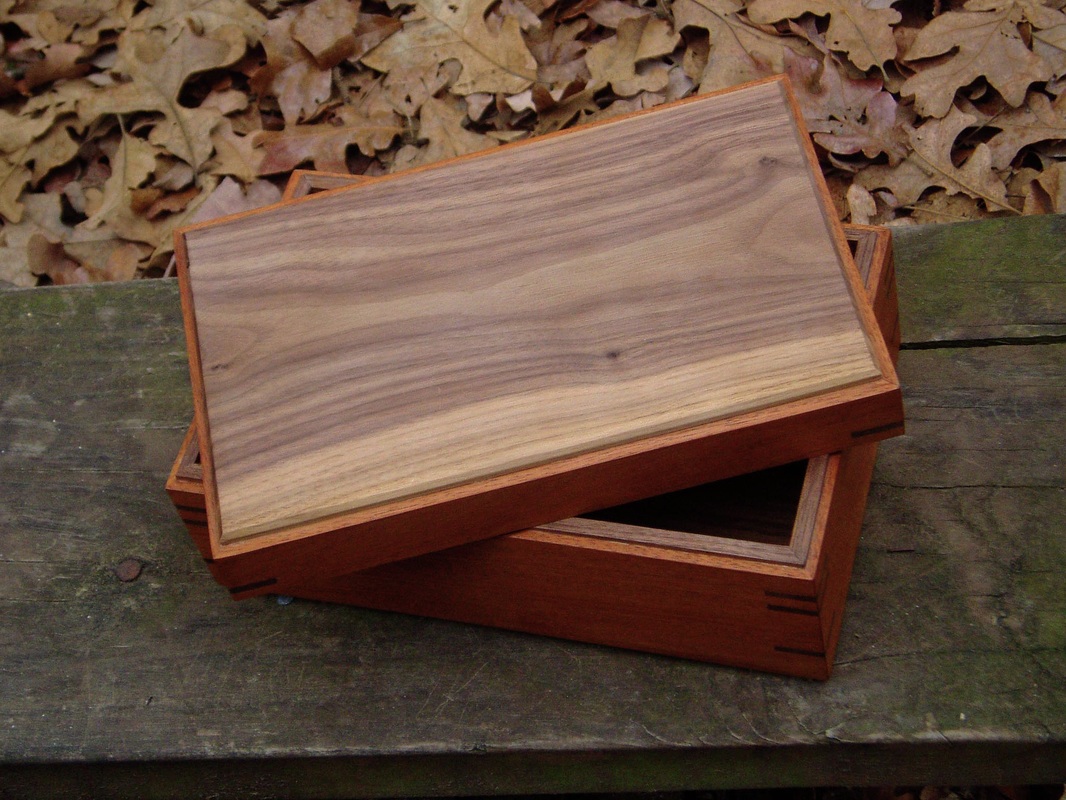 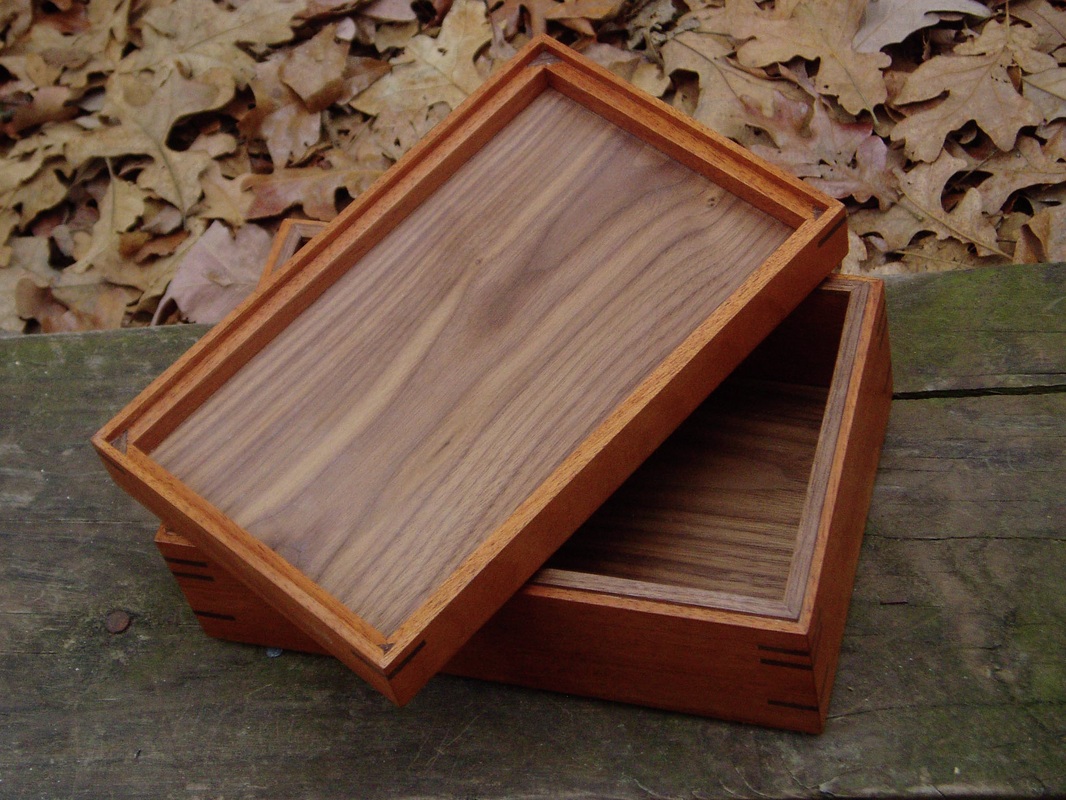 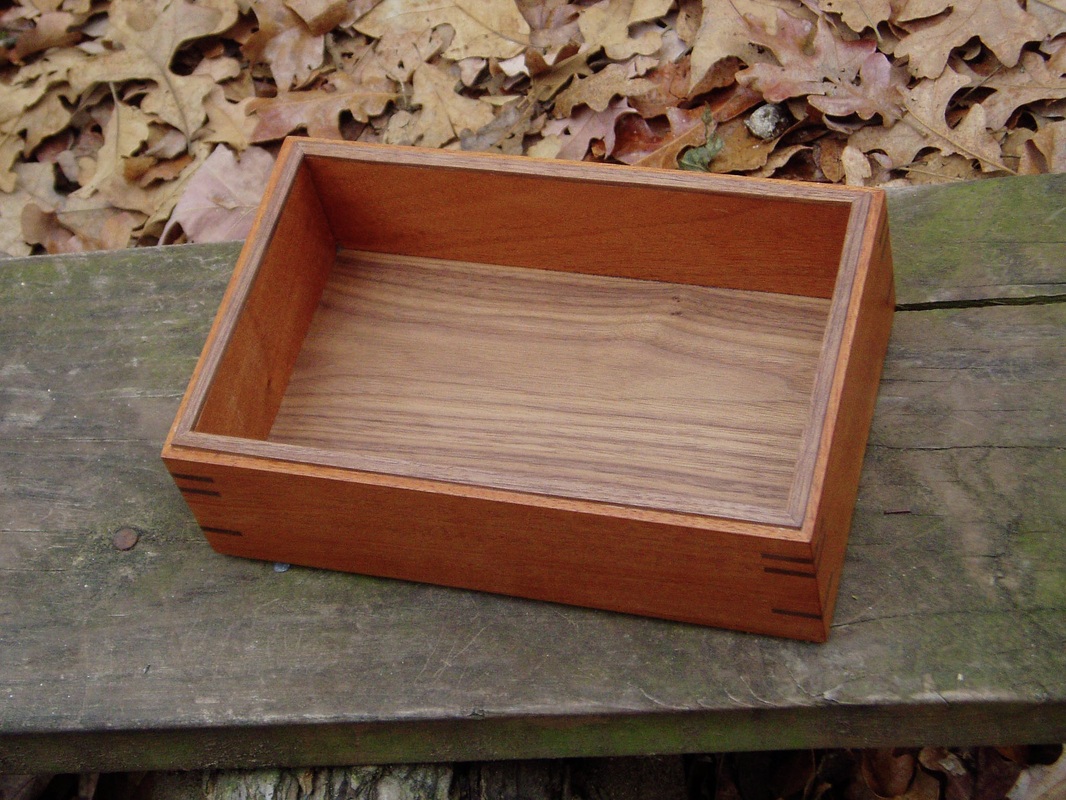  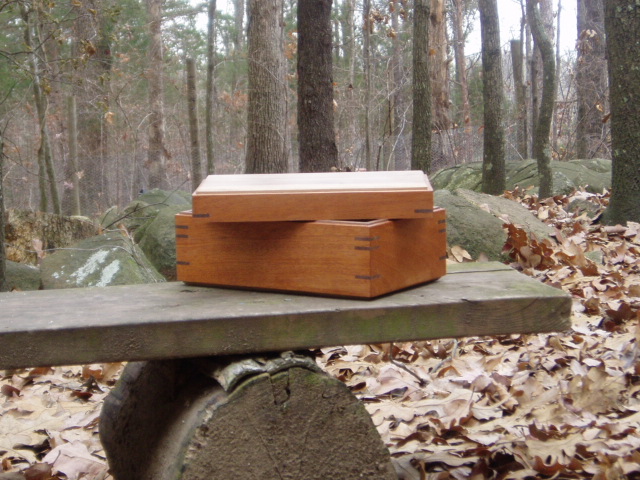 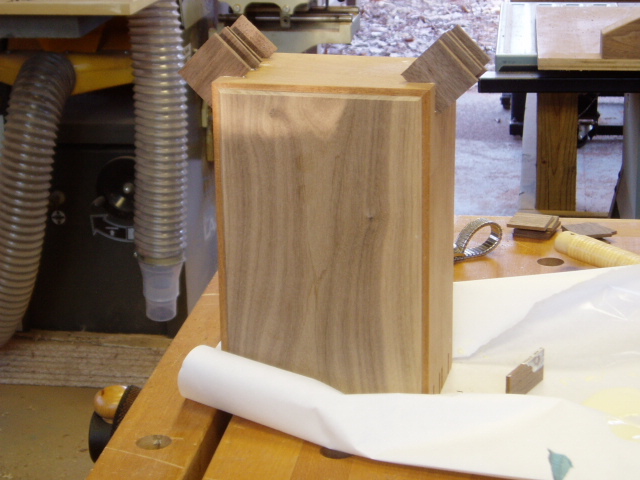 |
Archives
July 2017
Categories |
 RSS Feed